Blog
How to Install EBMX Surron Controller for Motor, Battery & Suspension (Complete 2026 Guide)
Mar
How to Install EBMX Surron Controller for Motor, Battery & Suspension (Complete 2026 Guide)
Upgrading your Surron bike with the EBMX controller is one of the most powerful modifications you can make. Many riders install the controller but overlook critical components: motor tuning, battery optimization, and suspension setup.
This guide will help you install and tune everything correctly so your bike becomes faster, smoother, and safer.
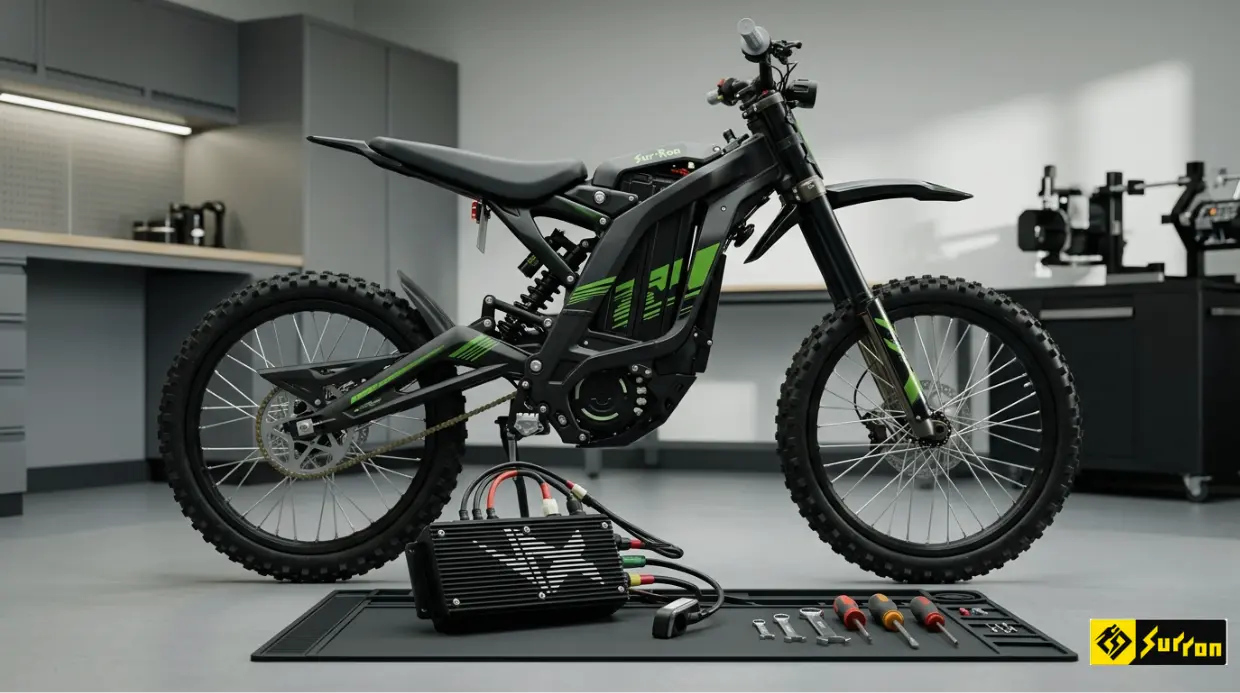
What is the EBMX X9000 Controller?
The EBMX X9000 Controller is a high-performance upgrade for bikes such as the Sur-Ron Light Bee X and Talaria Sting.
It replaces your stock controller and gives you:
- More power output
- Full tuning control
- Better throttle response
- Smart app connectivity
In simple words, it unlocks the real potential of your bike.
Why Most Riders Fail After Installing It (Pain Points)
Many riders install the controller but face issues like
- Weak acceleration
- The battery is draining too fast
- Overheating motor
- Poor ride control
The problem is NOT the controller.
The problem is:
- Wrong battery settings
- No motor tuning
- Ignoring suspension setup
This guide fixes all of that.
Tools & Parts You Need
Before starting, prepare everything:
Essential Parts:
- EBMX X9000 Controller kit
- Wiring harness
- Mounting brackets
Tools:
- Allen keys
- Screwdrivers
- Wrench set
- Zip ties
Safety Checklist (Do NOT Skip)
Safety is critical.
- Turn off the bike
- Disconnect the battery
- Remove the fuse or breaker
- Work in a dry space
Never work with a live battery it can damage your controller instantly.
Step-by-Step EBMX Controller Installation
Step 1: Remove the Stock Controller
- Open side panels
- Locate stock controller
- Disconnect all wires carefully
- Remove mounting bolts
Take a photo before removing wires. It helps later.
Step 2: Prepare the EBMX Controller
- Check all connectors
- Match wiring harness
- Test placement
Do NOT force connectors. They are designed to fit one way.
Step 3: Connect Motor Phase Wires
Motor wires control power delivery.
- Connect U, V, W wires
- Match color codes exactly
Wrong wiring = motor vibration or no movement.
Step 4: Connect Battery Wires
- Connect positive (+) and negative (-)
- Tighten connections firmly
Loose wires can cause:
- Power cuts
- Sparks
- Controller damage
Step 5: Install Wiring Harness
- Plug throttle, brake, and sensors
- Secure cables with zip ties
Keep wires away from moving parts.
Step 6: Mount the Controller
- Use proper bolts
- Ensure airflow around the controller
Heat is the biggest enemy of performance.
Motor Setup & Optimization
This is where most competitors fail, and most riders lose performance.
Stock Motor vs Upgraded Motor
Your stock motor can handle the EBMX controller, but with limits.
Stock Motor:
- Safe but limited power
- Can overheat under high load
Upgraded Motor:
- Higher torque
- Better heat control
- More stable performance
👉 Recommended upgrades:
- QS Motor
- EBMX performance motors
Motor Tuning Tips
After installation:
- Set current limits properly
- Avoid max power instantly
- Increase power step by step
This prevents:
- Motor burnout
- Efficiency loss
Heat Management (Critical)
High power = high heat.
To avoid damage:
- Do not ride full throttle continuously
- Allow cooling time
- Upgrade the cooling system if needed
Battery Setup & Power Configuration
Battery setup decides your performance.
Voltage Options
| Battery | Performance | Risk |
| 60V | Stable | Low |
| 72V | High power | Medium |
| 80V | Extreme | High |
Amp Settings Guide
- Beginner: 80–120A
- Intermediate: 120–200A
- Advanced: 200A+
Wrong amp settings = battery damage.
Common Battery Mistakes
- Using a stock battery with high settings
- Ignoring voltage limits
- Poor quality battery
Result:
- Voltage drop
- Power cut
- Short battery life
Suspension Setup After Controller Upgrade (Hidden Secret)
More power changes your ride completely. If you ignore suspension, your bike becomes unsafe.
Why Suspension Matters
After upgrade:
- Speed increases
- Torque increases
- Weight distribution changes
Front Fork Adjustment
- Increase stiffness
- Adjust rebound
Helps control high-speed riding.
Rear Shock Setup
- Increase preload
- Tune compression
Prevents bouncing during acceleration.
Riding Style Tuning
Street Riding:
- Softer setup
- Smooth handling
Off-Road Riding:
- Stiffer suspension
- Better shock absorption
EBMX App Setup & Calibration
The controller works with a mobile app.
Setup Steps:
- Connect via Bluetooth
- Update firmware
- Select ride mode
Calibration
- Throttle calibration
- Motor detection
- Sensor setup
Incorrect calibration = poor performance.
First Ride Checklist
Before your first ride:
- Check all connections
- Test throttle response
- Monitor temperature
Start slow. Do not go full power immediately.
Common Problems & Fixes
Bike Not Turning On
Cause: Loose battery wire
Fix: Check connections
Weak Performance
Cause: Low amp settings
Fix: Increase gradually
Overheating
Cause: High load + stock motor
Fix: Reduce power or upgrade the motor
Throttle Lag
Cause: Calibration issue
Fix: Recalibrate via app
EBMX Controller vs Stock Controller
| Feature | Stock Controller | EBMX X9000 |
| Power | Limited | Extreme |
| Customization | Basic | Advanced |
| Speed | Moderate | High |
| Control | Average | Precise |
Is the EBMX Controller Worth It?
If you want:
- More speed
- Better control
- Custom tuning
Then YES, it is worth it.
But only if you:
- Install correctly
- Tune motor & battery
- Adjust suspension
Who Should Upgrade?
This upgrade is perfect for:
- Performance riders
- Off-road enthusiasts
- Surron modifiers
FAQs
Can I use a stock battery?
Yes, but performance will be limited.
Is the installation beginner-friendly?
Yes, if you follow proper steps.
Will it increase speed?
Yes, significantly.
Do I need a motor upgrade?
Not required, but recommended for best performance.
Final Thoughts
Installing the EBMX controller is not just about replacing a part.
It is about building a complete performance system:
- Motor
- Battery
- Suspension
Most riders only install the controller. Smart riders tune everything.